In this first post on security with DataFlex WebApp we are looking at hardening the login of our webapp using Googles reCaptcha technology.
Googles reCaptcha is a free service that allows us to tell humans apart from bots and use that information to keep our site more secure.
We are going to implement both reCaptcha V2, the more commonly known reCaptcha with the ‘I am not a robot’ checkbox as well as reCaptcha V3.
reCaptcha V3 is completely invisible to the user and returns a score that can be used to control the use of additional security features such as Two Factor Authentication
To use Googles reCaptcha technology we will use the reCaptcha web control from StarZen Technologies. It is a simple wrapper control that allows use to easily incorporate the reCaptcha technology into our webapp
Add StarZen’s reCaptcha control
To add the reCaptcha control to the webapp we have to copy the javascript files to our AppHtml folder. We also have to add the package files for the control to our source folders.
In addition we have to reference these files in our index.html file as follows
<!-- StarZen reCaptcha V2 -->
<link rel="stylesheet" type="text/css" href="StarZen/szdfreCaptchaV2.css">
<script src="StarZen/szdfreCaptchaV2.js" type="text/javascript"></script>

<!-- StarZen reCaptcha V3 -->
<script src='https://www.google.com/recaptcha/api.js?render=6LdHBGMUAAAAADKVo1rguQeHBAn-iZ1ObeIOvlog'></script>
<link rel="stylesheet" type="text/css" href="StarZen/szdfreCaptchaV3Button.css">
<script src="StarZen/szdfreCaptchaV3Button.js" type="text/javascript"></script>
The Google reCaptcha service requires us to register and then use a sitekey and a secret phrase. The best way to supply these values to the control is to build a subclass
the code for the reCaptcha V2 class is as follows
Class cMyRecaptchaV2 is a cszreCaptchaV2
    Procedure Construct_Object
        Forward Send Construct_Object

        Set psCaptchaSiteKey to "YOUR RECAPTCHA SITE KEY"
        Set psCaptchaSecret to "YOUR RECAPTCHA SECRET"
    End_Procedure
End_Class
A Similar class is needed for the V3 reCaptcha button class
Class cMyreCaptchaV3Button is a cszreCaptchaV3Button
    Procedure Construct_Object
        Forward Send Construct_Object

        Set psCaptchaSiteKey to "YOUR RECAPTCHA V3 SITEKEY"
        Set psCaptchaSecret to "YOUR RECPATCHA V3 SECRET"
    End_Procedure
End_CLass
We also want settings to control the use of the reCaptcha control in our application so we will add a few properties to our webapp object
// Recaptcha Settings

// Use Recaptcha
Property Boolean pbUseReCaptcha True
// Version of recaptcha (V2, V3)
Property String  psUseCaptchaVersion "V2"
First we add the pbUseReCaptcha property. Setting it to true will enable reCaptcha while setting it to false will completely disable it.
We also add the psUseCaptchaVersion property that will allow us to select the version of Recaptcha to use. Currently either “V2” or “V3”
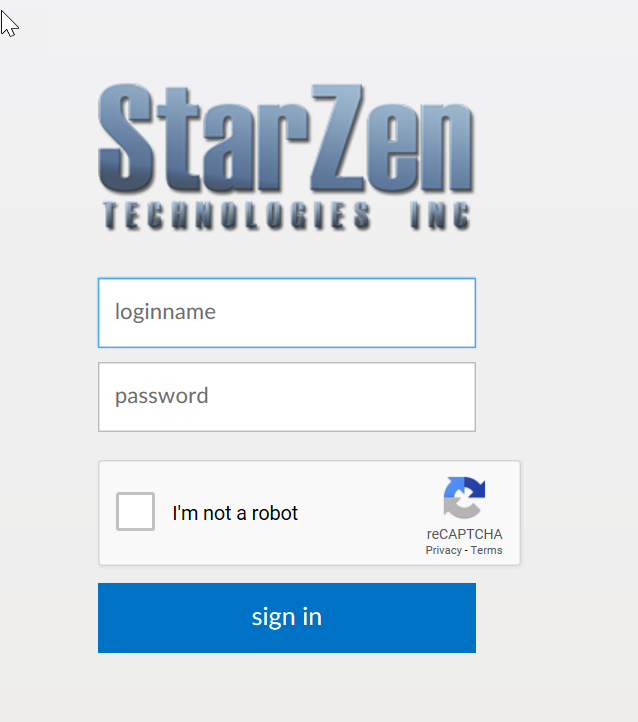
Now on to the login screen to add the reCaptcha control and use it
After adding a use statement at the top for our reCaptcha V2 class we will add a reCaptcha V2 object just before the login button
Object oRecaptchaV2 is a cMyRecaptchaV2
    Set piColumnSpan to 10
    Set piColumnIndex to 1
End_Object
To implement the switch to turn reCaptcha functionality on and off we modify the OnLoad procedure as follows
Procedure OnLoad
    Forward Send OnLoad
    Send HideHeader to ghoWebApp
    WebSet psCSSClass of ghoWebApp to "LoginBackground"

    If (pbUseReCaptcha(ghoWebApp)) Begin
        // reCaptcha enabled
        Set pbRender of oRecaptchaV2 to True
    End
    Else Begin
        // reCaptcha disabled
        Set pbRender of oRecaptchaV2 to False
    End
End_Procedure
Based on the pbUseRecaptcha property we either render or hide the reCaptcha V2 control
to use the reCaptcha V2 we need to modify the login buttons OnClick method as follows
Procedure OnClick
    If (pbUseReCaptcha(oWebApp(Self))) Begin
        // verify captcha token with Google
        Send VerifyToken to oRecaptchaV2

        If (pbCaptchaResponse_Success(oRecaptchaV2(Self))) Begin
            // ok
            Send DoLogin
        End
        Else Begin
            // failed
            Send ShowInfoBox "Please check the I am not a robot checkbox"
            Procedure_Return
        End

    End
    Else Begin
        Send DoLogin
    End
End_Procedure
when the login button is clicked we call the VerifyToken method of the reCaptcha control. This will validate our reCaptcha token with google.
if the validation is ok we will simply call the DoLogin method. If the validation fails we will show a message box to the user alerting them to check the ‘I am not a robot’ checkbox.
reCaptcha V3
The recaptcha V2 service requires a visual element the user has to interact with. The new reCaptcha V3 service does not need any interaction with the user at all. It is fully transparent to the end user
The reCaptcha V3 control returns a score between 0.0 and 1.0, 1 being most likely to be human and 0 being most likely a bot.
We wrapped the reCaptcha V3 functionality into a button class for WebApp making it very easy to be added to for example a login page by replacing the login button
Because we want to be able to switch reCaptcha versions we will add the V3 login button and control the use with our properties
after adding a use statement for our reCaptcha V3 class we created earlier we can add the following button right after the existing login button
Object oLoginButtonreCaptchaV3 is a cMyreCaptchaV3Button
    Set pbShowLabel to False
    Set psCaption to "Login"
    Set pbServerOnClick to True
    Set piColumnSpan to 10
    Set piColumnIndex to 1

    Set psCaptchaAction to "Login"

    Procedure OnCaptchaVerified Boolean bSuccess Number nScore
        If (bSuccess) Begin

        End
        Else Begin
            Send ShowInfoBox "Login Failed - reCaptcha"
        End
    End_Procedure

End_Object
this will add another login button to our login screen. Instead of a regular OnClick procedure this control as a OnCaptchaVerified event that fires when the captcha token us verified after the user clicks the button.
The event has two parameters a boolean indicating success and a number containing the reCaptcha score. The score ranges from 0.0 to 1.0 with 1.0 showing a strong indication of the user being human while a score of 0 showing a strong indication of the user being a bot.
The application can then take steps based on these scores. For this first example we will simply only allow login with scores above a certain number. We will add a property do define that value as well
So lets add our property to our webapp object
// Minimum score required for login
Property Number  pnMinimumCaptchaScoreForLogin 0.7
and then in our OnCaptchVerified event we will use that value
Procedure OnCaptchaVerified Boolean bSuccess Number nScore
    If (bSuccess) Begin
        If (nScore >= pnMinimumCaptchaScoreForLogin(Self)) Begin
            Send DoLogin
        End
        Else Begin
            Send ShowInfoBox "Login Failed - reCaptcha Score"
        End
    End
    Else Begin
        Send ShowInfoBox "Login Failed - reCaptcha"
    End
End_Procedure
This code will now check the score and if the score is at least the score in our setting will allow the login otherwise will show an error to the user
In our next installment to this series we will look at using the score from the recaptcha service to control the use of Two Factor Authentication.
